conda install -y jupyterlab jupyterlab-git git ghIntroduction to Data Science
Computer Setup
Important Information
Email: joanna_bieri@redlands.edu
Office Hours take place in Duke 209 – Office Hours Schedule
Class Website:
Announcements
Today your goal is to get your computer set up!
Need help this week? My office hours are Tuesday, Wednesday, and Thursday from 11:00am-12:00pm in Duke 209 - see the Office Hours Schedule above for any changes.
Setting up your computer.
The first thing you need to do to be successful in this class is get your computer set up so you can use all the data science tools. You should be able to just follow the steps in this notebook, but please come get help if you need it. A good set up today saves a lot of heartache later in the semester!
Already installed Anaconda before class? You are not stuck, but do not follow this page. Go to the Anaconda account page instead and I will get you sorted.
1. Install Miniforge:
Miniforge gives you Python and a tool called conda that installs data science packages for you. It is free, it is run by the same open source community that maintains most of the packages we will use, and it does not ask you to make an account or tell it where you work.
We will be using Python and JupyterLab to do all our assignments
Click the link for your computer to start the download:
- Windows: Miniforge for Windows
- Newer Mac (Apple Silicon, M1 through M4): Miniforge for Apple Silicon Macs
- Older Mac (Intel chip): Miniforge for Intel Macs
Not sure which Mac you have? Click the apple in the top left corner of your screen and choose About This Mac. If it says Apple M1, M2, M3, or M4, you want the Apple Silicon one.
Now open the file you downloaded and click through the installer. Accept all of the default choices. There is one checkbox worth reading:
- On a Mac, near the end it offers to set up conda for your shell. Leave that checked.
- On Windows, just keep clicking Next and then Install.
The installer window is plain looking and it does not open anything when it finishes. That is normal, there is no Miniforge app to go find. Everything happens in the next step.
2. Install JupyterLab and the Git tools:
For this step you need a terminal, which is a window where you type commands instead of clicking buttons. Open it like this:
- Windows: click the Start menu, type
Miniforge Prompt, and open it. - Mac: press COMMAND-SPACE, type
Terminal, and press Enter.
You should get a window with some text and a blinking cursor. Copy the command below, paste it into that window (CTRL-v on Windows, COMMAND-v on Mac), and press Enter.
Hover over the box with your mouse and click the clipboard icon to copy it.
It will think for a minute, print a big list of packages, and ask you nothing else. Let it finish completely before you type anything else. You will know it is done when your blinking cursor comes back.
You only do this once, not every week.
3. Start JupyterLab:
In that same terminal window, type this and press Enter:
jupyter labJupyterLab will open in a browser window. You will see a list of files on the left side of the page and the Launcher on the right side of the page.
This is how you start JupyterLab from now on. Every time you want to work on this class: open the Miniforge Prompt (Windows) or Terminal (Mac), type jupyter lab, press Enter. That is the whole routine.
Leave that terminal window open while you work. It is the thing actually running JupyterLab, so if you close it your notebooks will stop saving. You can make it small and hide it behind your browser, just do not quit it.
Now let’s make sure it works:
- Make yourself a new folder just for our class by clicking on the icon in the top left corner:

Name the folder anything you want - Data101 is a good name - and then double click on it to enter the folder.
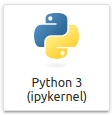
Now we are ready to make a new file. In the launcher window, Click on the Python 3 notebook.
This will open up your first notebook named Untitled.ipynb
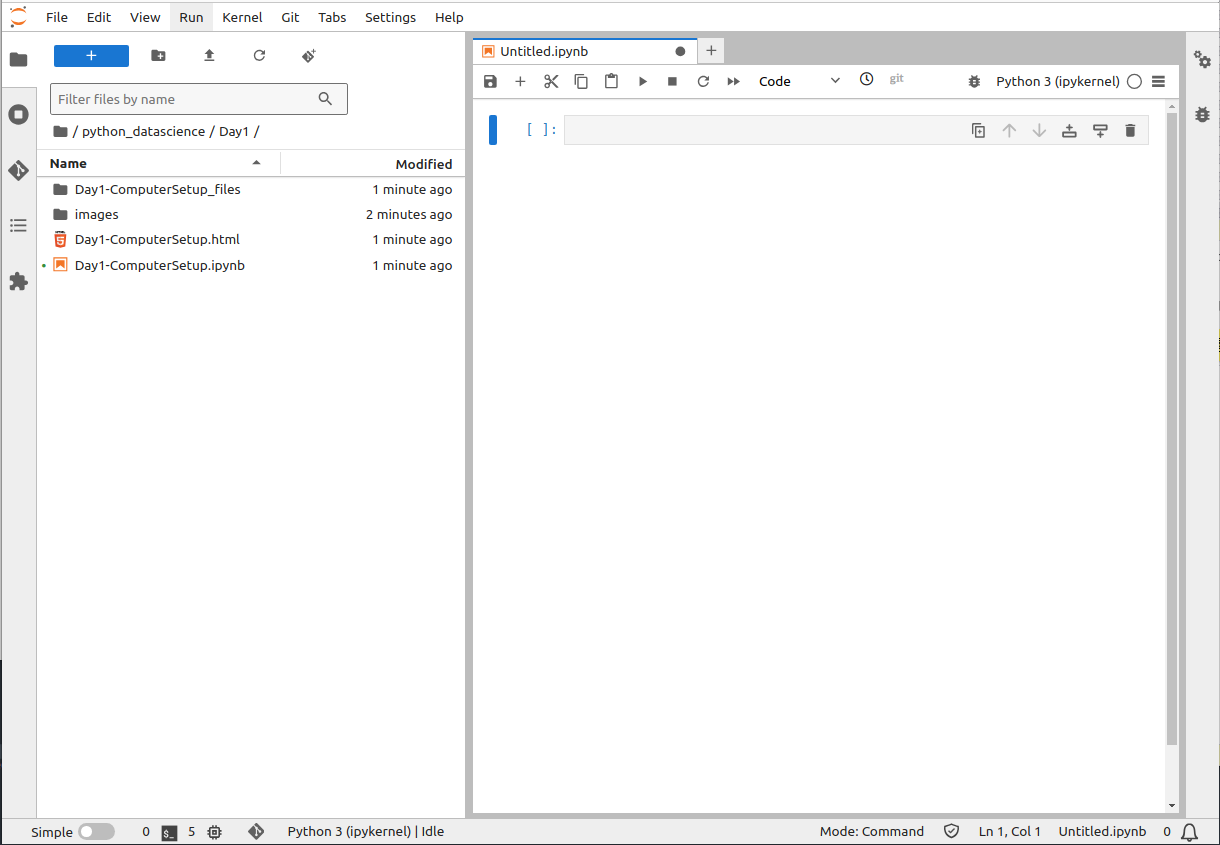
- Jupyter notebooks are organized in cells (gray space). This is where you can type in your code. To run the cell either push the run button at the top of the notebook, or press SHIFT-ENTER.
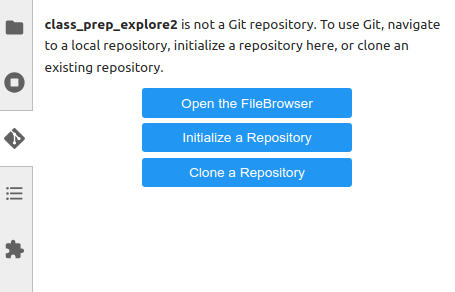
You should also see a tab on the left hand side for Git. This is the icon:

- Click on this tab to see the options
4. Sign up for a GitHub account:
Click the link below to open GitHub in a new browser window.
- Enter your University of Redlands email address and click continue
- Create a password
- Create a user name - be professional here since GitHub is a great place to show future employers projects that you have worked on.
- Solve the weird puzzle to prove you are a human.
- Check your university of Redlands email to verify your account.
- Sign in to GitHub
- Now it will ask you some questions: You are a student and using this just for yourself. You can ignore all the extra packages it suggests and just hit continue.
- When asked about what kind of subscription you want, you can Continue for Free unless you want to explore some more advanced features that we won’t use in this class
Now send me your username
I need your GitHub username to make your repository for the semester. Take ten seconds and fill this out:
Type just the username, not your email and not the whole web address. If your profile is https://github.com/janestudent, your username is janestudent.
You cannot do step 6 until I have this, so do it now while you are thinking about it.
5. Connect your computer to GitHub
This needs a terminal again, but this time we will use one inside JupyterLab so we do not disturb the window that is busy running it.
In JupyterLab, click the + to open the Launcher tab and choose Terminal. A new tab opens with a blinking cursor. Type this and press Enter:
gh auth loginIt will ask you four questions. Use the arrow keys to pick an answer and press Enter to confirm:
| Question | Your answer |
|---|---|
| What account do you want to log into? | GitHub.com |
| What is your preferred protocol? | SSH |
| Generate a new SSH key? | Yes (press Enter for no passphrase) |
| How would you like to authenticate? | Login with a web browser |
Copy the one-time code it shows you, press Enter, and finish signing in on the browser tab that opens.
This is the step that prevents every login problem later. Do it before anything else below. Once it is done, GitHub never asks you for a password again - not this week, not in December.
You can check it worked by typing this in the same Terminal tab:
gh auth statusYou should see a green checkmark and your username.
6. Get your repository
You will get an email inviting you to a GitHub repository named something like data101-f26-yourname. Accept the invitation. Check your spam folder if you do not see it.
Your repository is private. Only you and I can see it - nobody else in the class can see your work.
Now clone it - entirely inside JupyterLab, no Terminal needed:
Click the Git icon in the left sidebar of JupyterLab (the same one from step 3):
Git Icon Click Clone a Repository.
Paste in your repository’s address:
git@github.com:Redlands-DATA101/data101-f26-yourname.git(I will give you your exact address in class - it will also be posted on the Day 1 page of the course website.)
Click Clone.
You should now see the folder data101-f26-yourname appear in your JupyterLab file list on the left. Double-click into it - it already contains a folder for every class day of the term (Day1 through Day20), so there is no need to make your own folders for class files. Each folder has a short README reminding you how the weekly workflow works. Each week you will hand in that week’s two days - e.g. Day3 and Day4 - by pushing them before Sunday night at 11:59pm, ahead of our Tuesday class.
(If the clone fails, get help - it almost always means step 5 was not finished. Check gh auth status in a Terminal tab.)
7. The Week 1 test
Do this now, while help is available:
Inside your
data101-f26-yournamefolder, create a new text file calledhello.txt. Put your name in it. Save it (CONTROL+S or COMMAND+S, or the save button ).
).Click the Git icon
in the left sidebar.Find
hello.txtunder Changed. Click the + next to it to Stage it.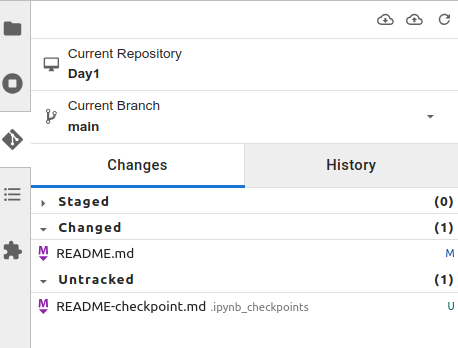
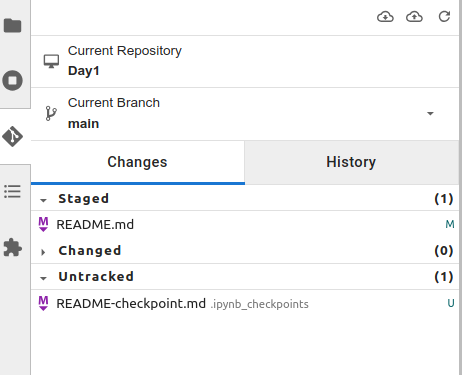
Type a message in the Summary box:
first commit. Click Commit.
Commit Changes Click the up-arrow Push button at the top of the Git panel.

Pull Push Refresh Buttons Go to your repository page on github.com and refresh. See
hello.txt? You are done.
If step 6 does not work, get help today - do not leave class with this broken.
8. Install your Python packages
Your repository includes a requirements.txt file listing every Python package you will need this semester (pandas, numpy, matplotlib, and the rest). Install them all in one shot.
Open a new notebook inside your data101-f26-yourname folder and run the cell below (it is already written for you).
You only need to do this once - not before every class.
!pip install -r requirements.txtWhy are you making me do this Joanna!?!?!?
GitHub is what professionals in industry use. It is good to get some experience early. It also gives you a backup of all your work, just in case your computer crashes or dies completely. It is also GREAT for professional collaborations. Two or more people can push and pull from the same repository! We will learn more about this later in the semester.
- Clone means to get a copy of your repository from GitHub onto your computer - do this once.
- Stage means you made changes you are ready to commit.
- Commit means make a bookmark of these changes, they are good.
- Push means to send your changes from your computer up to GitHub.
- Pull means to refresh your copy of the code, getting stuff from GitHub down onto your computer.
    graph LR
      Z[GitHub: My Private Repo] -.->B(Clone Once)
      B-.-> C((JupyterLab <br/> <br/> Make Changes))
      subgraph Local
      C ==> D(Commit <br/> Changes)==> C
      end
      C ==> E(Push and Pull) ==> Z
      Z ==> E ==> C
You are done!
This is all you need for your basic setup - whats next?
Start playing around with the files that you cloned.
Look up a Python Tutorial (introduction) to get a head start.
Check out the extensions tab

- I like to add a spellchecker, but there are lots of things to explore.
Go to settings and change your Theme
Push all the buttons!